In my previous blog post, I ranked five different store-bought brownie mixes to see which one was the best for its price. If you have time on your hands and are willing to put more effort into what you put on the plate, you could go the homemade route.

Though it takes longer to make and the cost can add up, homemade brownies surpasses those made from brownie mixes in both taste and texture.

I got this brownie recipe from Buzzfeed’s Tasty food blog. It is my go-to recipe when I want to make brownies from scratch. Tasty’s bakers went through a long process of trial and error, combining techniques and recipes to produce “The Best Brownies.”

The first time I tried to make this recipe, it did not come out right. I made the mistake of adding too much salt and vanilla extract. I was not willing to give up though. The second time I made this recipe, I made sure to follow the recipe word for word, using the exact amount of ingredients specified.


Tips on Brownie Ingredients:

  • Chocolate: I use semi-sweet chocolate chips and the brownies come out just fine. But for a richer and more chocolatey taste, a chips with higher amounts of cacao are best.
  • Espresso Powder: The espresso powder is optional. It will enhance the chocolate flavor but in my opinion, the brownies taste good even without it. You could use decaf powder if you want the extra flavor without the caffeine.
  • Butter: I have made the mistake of melting butter in the microwave, where it often explodes, creating a huge mess. I find it best to melt the butter in a small saucepan on medium heat, just until the butter is completely melted.
  • Brown Sugar: When measuring brown sugar, you want to spoon the sugar into the measuring cup and pack it tightly using a spoon. Don’t measure the sugar without packing it down or you won’t get the right amount of sugar into your recipe.
  • Eggs: Though cracking eggs may seem like a simple task, to be safe, you should always crack them into a separate bowl before pouring them into your mixture. This prevents eggshells from getting into your brownie mixture.
  • Flour: When measuring out flour or any other powdery ingredient, spoon the flour into the measuring cup instead of scooping the flour directly with the cup. This will ensure that you get the right amount of what you are measuring. Always level out your scooped flour with the back of a knife.

Tips on Making the Brownie:

  1. To avoid the getting the brownie stuck in the pan, use parchment paper. Lightly butter or spray the pan with cooking spray to get the paper to stick to the pan. You can put parchment paper all around the sides and the bottom but I just put it across one way. After that, I spray or butter the paper to make sure the brownie comes out clean.
  2. The key to a light and fluffy brownie is to whip the eggs and sugar well—for at least 10 minutes. By doing this, you also won’t need to use any chemical leaveners like baking soda or baking powder. Using a stand mixer or hand mixer will make this process easier and faster.
  3. One thing I learned from the Tasty blog was the banging method. After the brownie bakes for about 20 minutes, you want to bang the pan on your kitchen counter. This will even out the brownie, giving it a more consistent texture.
  4. So how do you know if the brownie is ready? For most baked goods, you should stick a toothpick in and see if any wet batter sticks to it when you pull it out. This brownie recipe, however, makes very “fudgy” brownies so your toothpick may not come out completely clean. Just make sure what comes off is not raw batter.

The Best Brownie Recipe

From Buzzfeed’s Tasty Food Blog
Top, from left to right: Semi-sweet chocolate chips; granulated sugar; flour; cocoa powder; Bottom: Melted butter; eggs; dark brown sugar; vanilla extract and salt. Photograph by Zadie Young (’22).
  • 2 ½ sticks unsalted butter, plus more (softened, for greasing)
  • 8 oz good-quality semi-sweet chocolate, or bittersweet chocolate, 60-70% cacao, roughly chopped
  • ¾ cup unsweetened Dutch process cocoa powder, loosened
  • 1 Tbsp espresso powder
  • 2 cups granulated sugar
  • ½ cup dark brown sugar, packed
  • 2 tsp vanilla extract
  • 2 tsp kosher salt
  • 6 large eggs
  • 1 cup all-purpose flour
  • Flaky sea salt, for sprinkling

Directions:

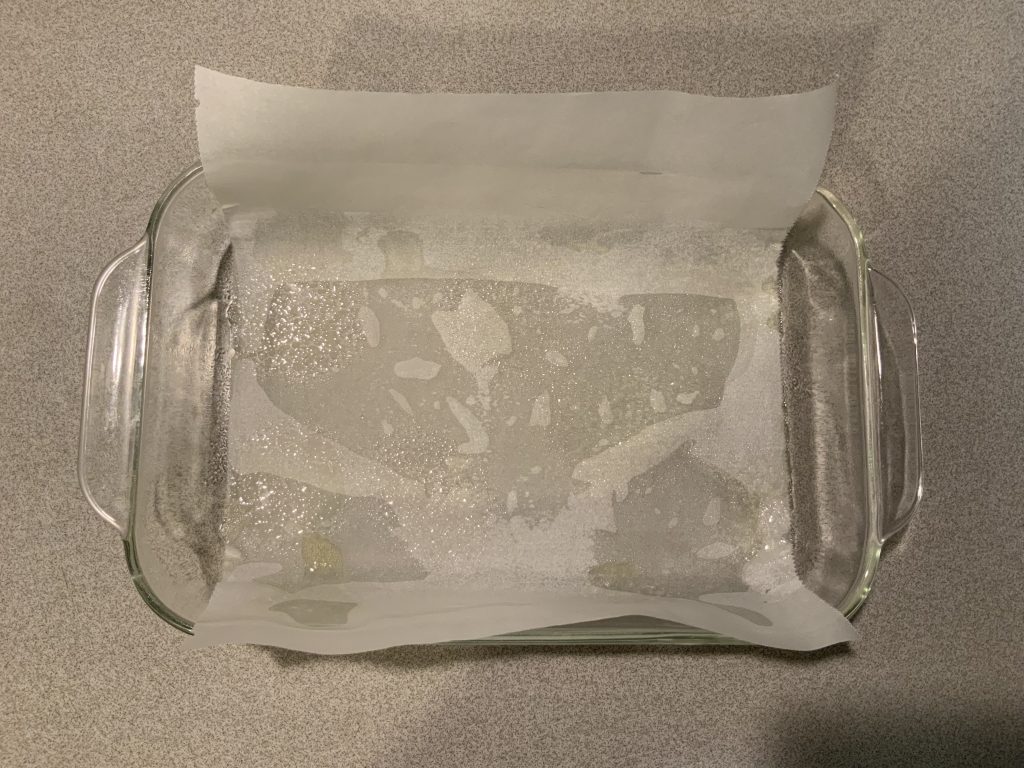
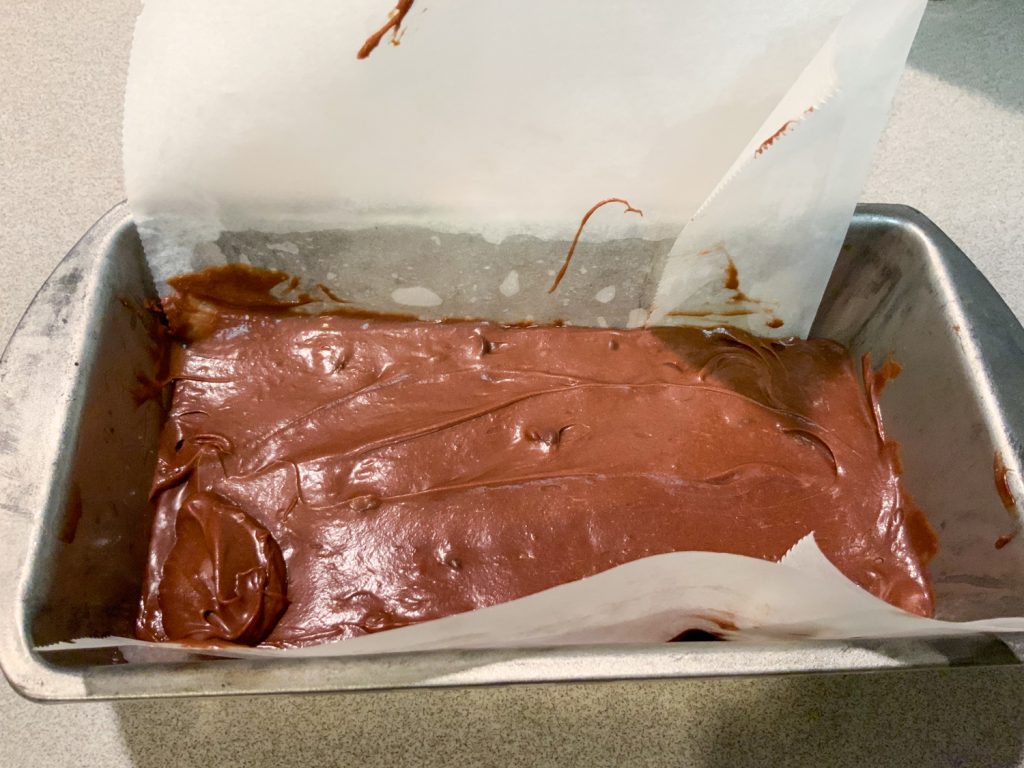
1. Grease a 9×13 inch pan with softened butter, then line with parchment paper, leaving overhang on all sides. Grease the parchment with softened butter.

You can use softened butter or cooking spray to grease the pan. Photograph by Zadie Young (’22).

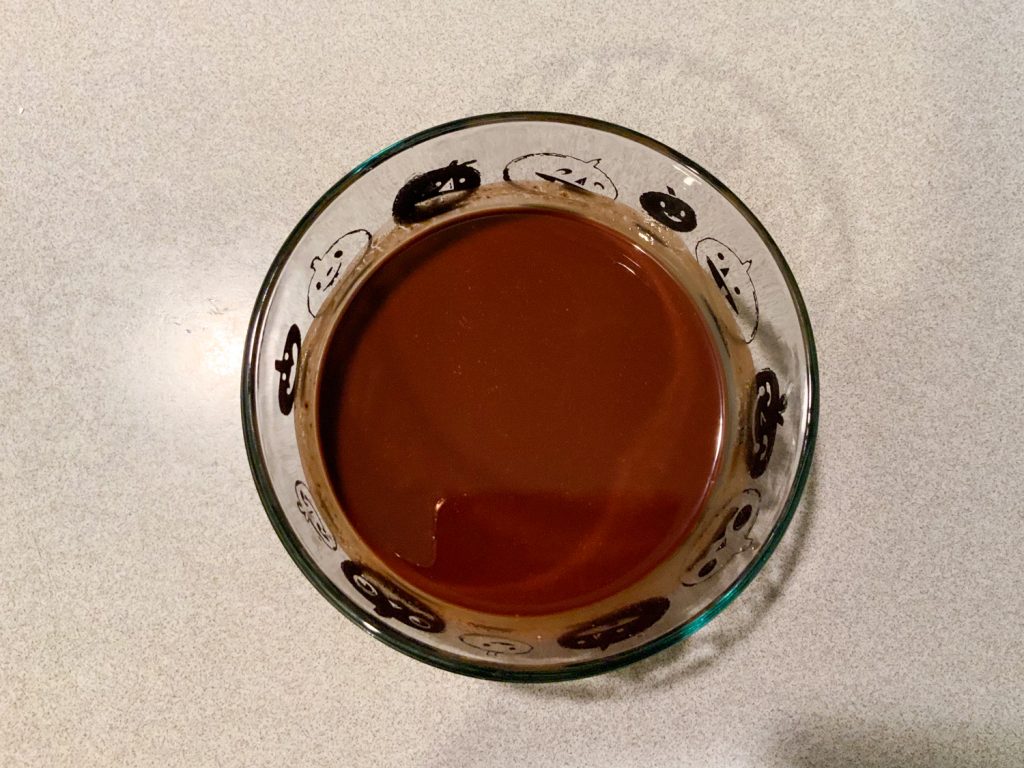
2. Combine the chopped chocolate, ¼ cup of cocoa powder, and espresso powder in a heatproof liquid measuring cup or medium bowl and set aside.

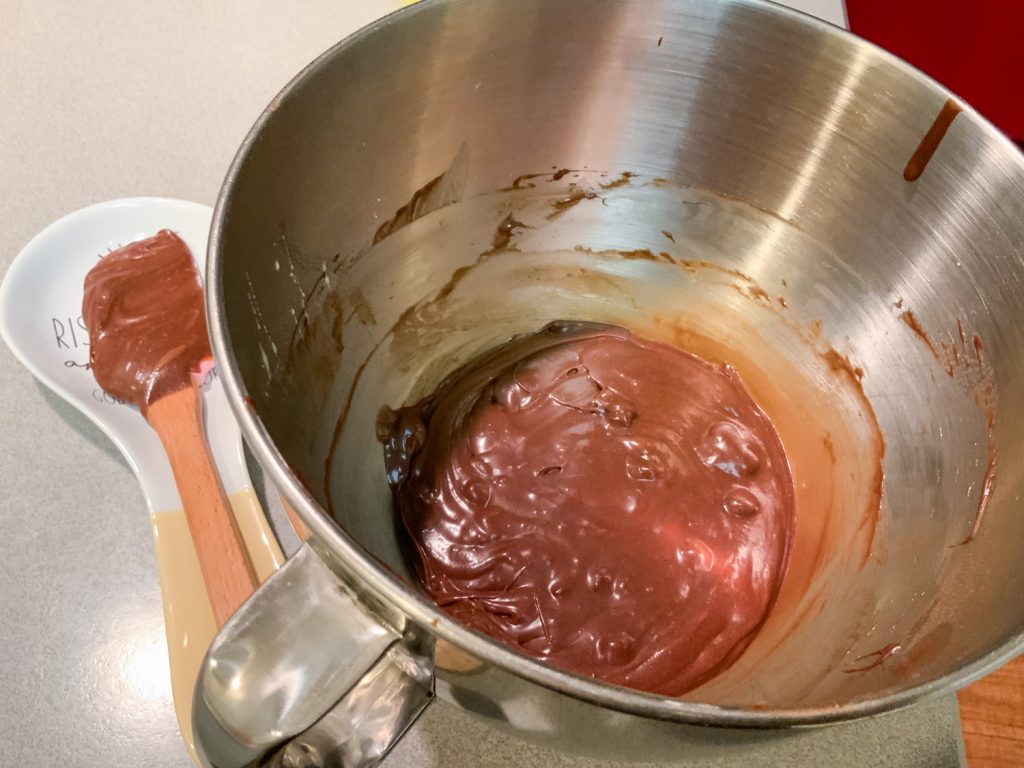
3. Add the butter to a small saucepan over medium heat and cook until the butter just comes to a vigorous simmer, about 5 minutes, swirling the pan occasionally. Immediately pour the hot butter over the chocolate mixture and let sit for 2 minutes. Whisk until the chocolate is completely smooth and melted, then set aside.

Pour the hot butter into the chocolate mixture right away and let it sit so that the heat of the butter can melt the chocolate. After the chocolate starts to melt, stir until it is completely smooth, as in this picture above. Photograph by Zadie Young (’22).

4. Combine the granulated sugar, brown sugar, vanilla extract, salt, and eggs in a large bowl. Beat with an electric mixer on high speed until light and fluffy, about 10 minutes. It will be similar to the texture of a very thick pancake batter.

Periodically scape down the sides and bottom of the bowl to ensure that everything is fully incorporated. Don’t worry about over-mixing the batter because that cannot happen at this stage. It is best to mix it for 10 minutes or longer. Photograph by Zadie Young (’22).

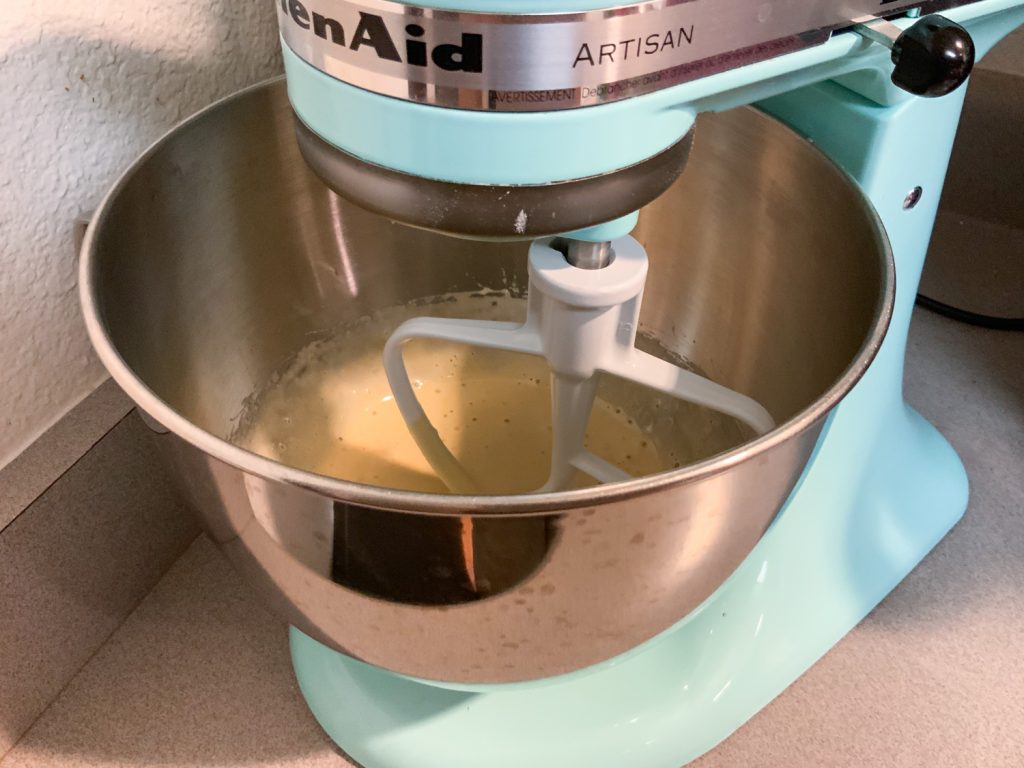
5. With the mixer on, pour in the slightly cooled chocolate and butter mixture and blend until smooth.

6. Position a rack in the middle of the oven and preheat on 350°F.

7. Sift in the flour and remaining cocoa powder, and use a rubber spatula to gently fold until just combined.

At this stage, you can also fold in chocolate chips like I did if you want your brownies to have extra chocolate. Photograph by Zadie Young (’22).

8. Pour the batter into the prepared baking pan and smooth out the top with a spatula. Bake until lightly puffed on top, about 20 minutes.

After smoothing the batter out in the pan, tap the pan on the table a bit to get rid of air bubbles. Photograph by Zadie Young (’22).

9. Remove the baking pan from the oven using oven mitts or kitchen towels, then lightly drop the pan on a flat surface 1 to 2 times until the brownies deflate slightly. Sprinkle with flaky sea salt and return to oven.

Don’t be afraid to use some force when banging the pan on the table. Doing this midway through baking time will crack the top and even out the brownie, giving the brownies a consistent texture. Photograph by Zadie Young (’22).

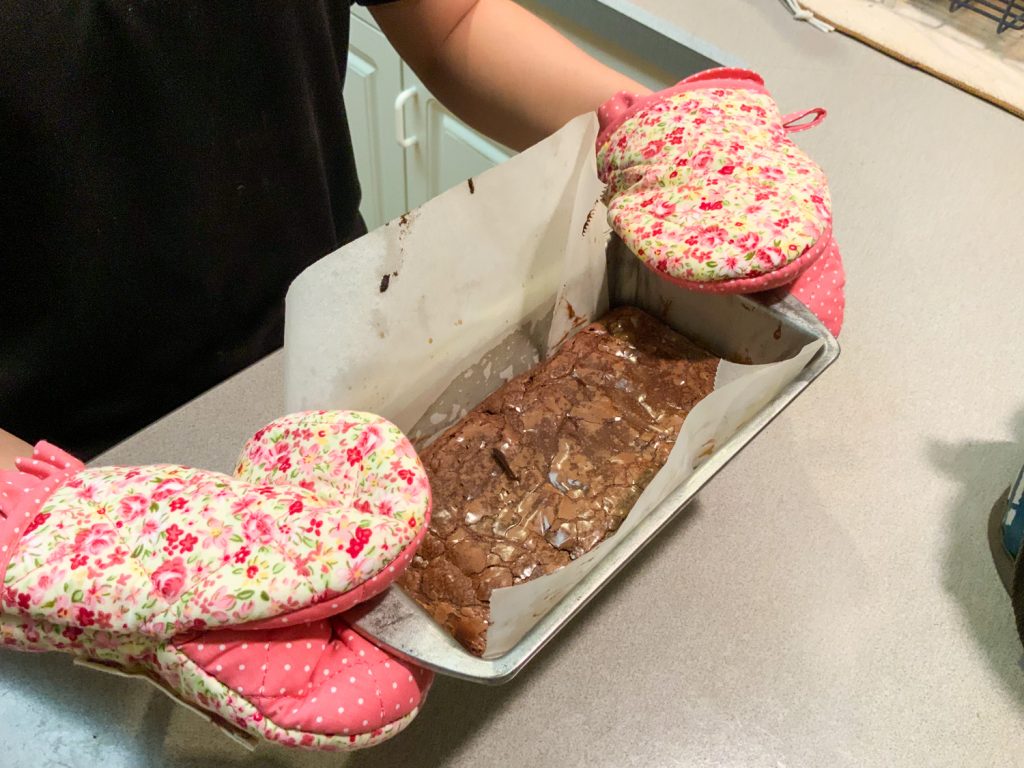
10. Bake until a wooden skewer inserted into the center of the brownies comes out fudgy and the edges look cooked through, about 20 minutes or more.

The center of the brownies will seem under-baked, but the brownies will continue to set as they cool. Photograph by Zadie Young (’22).

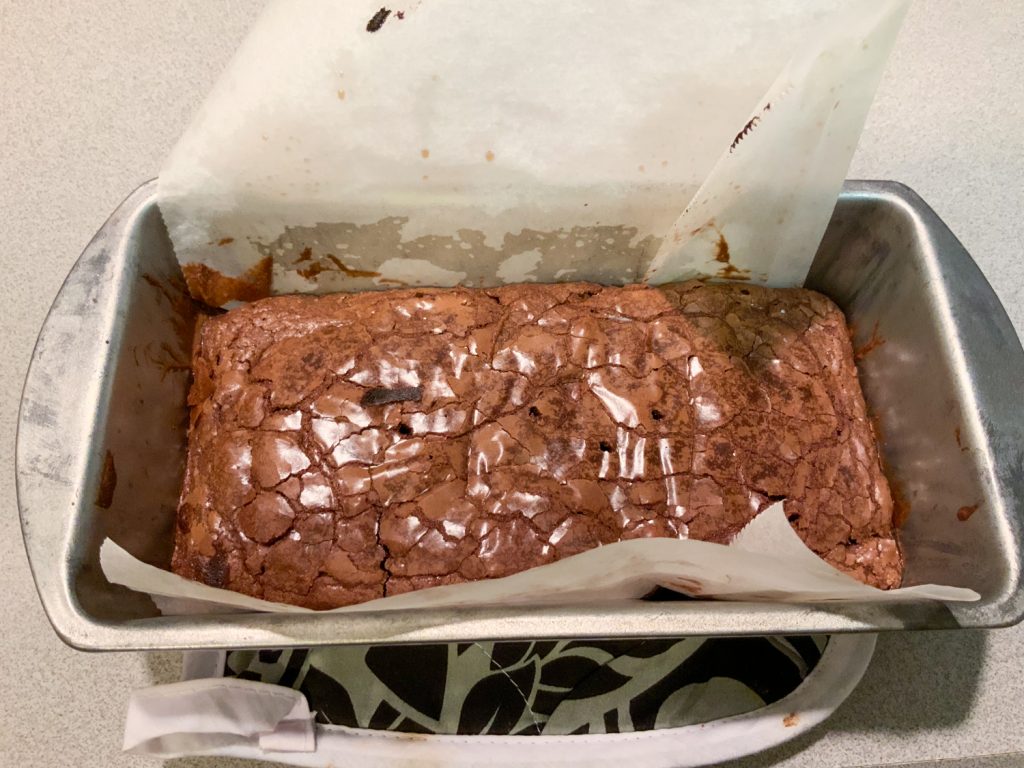
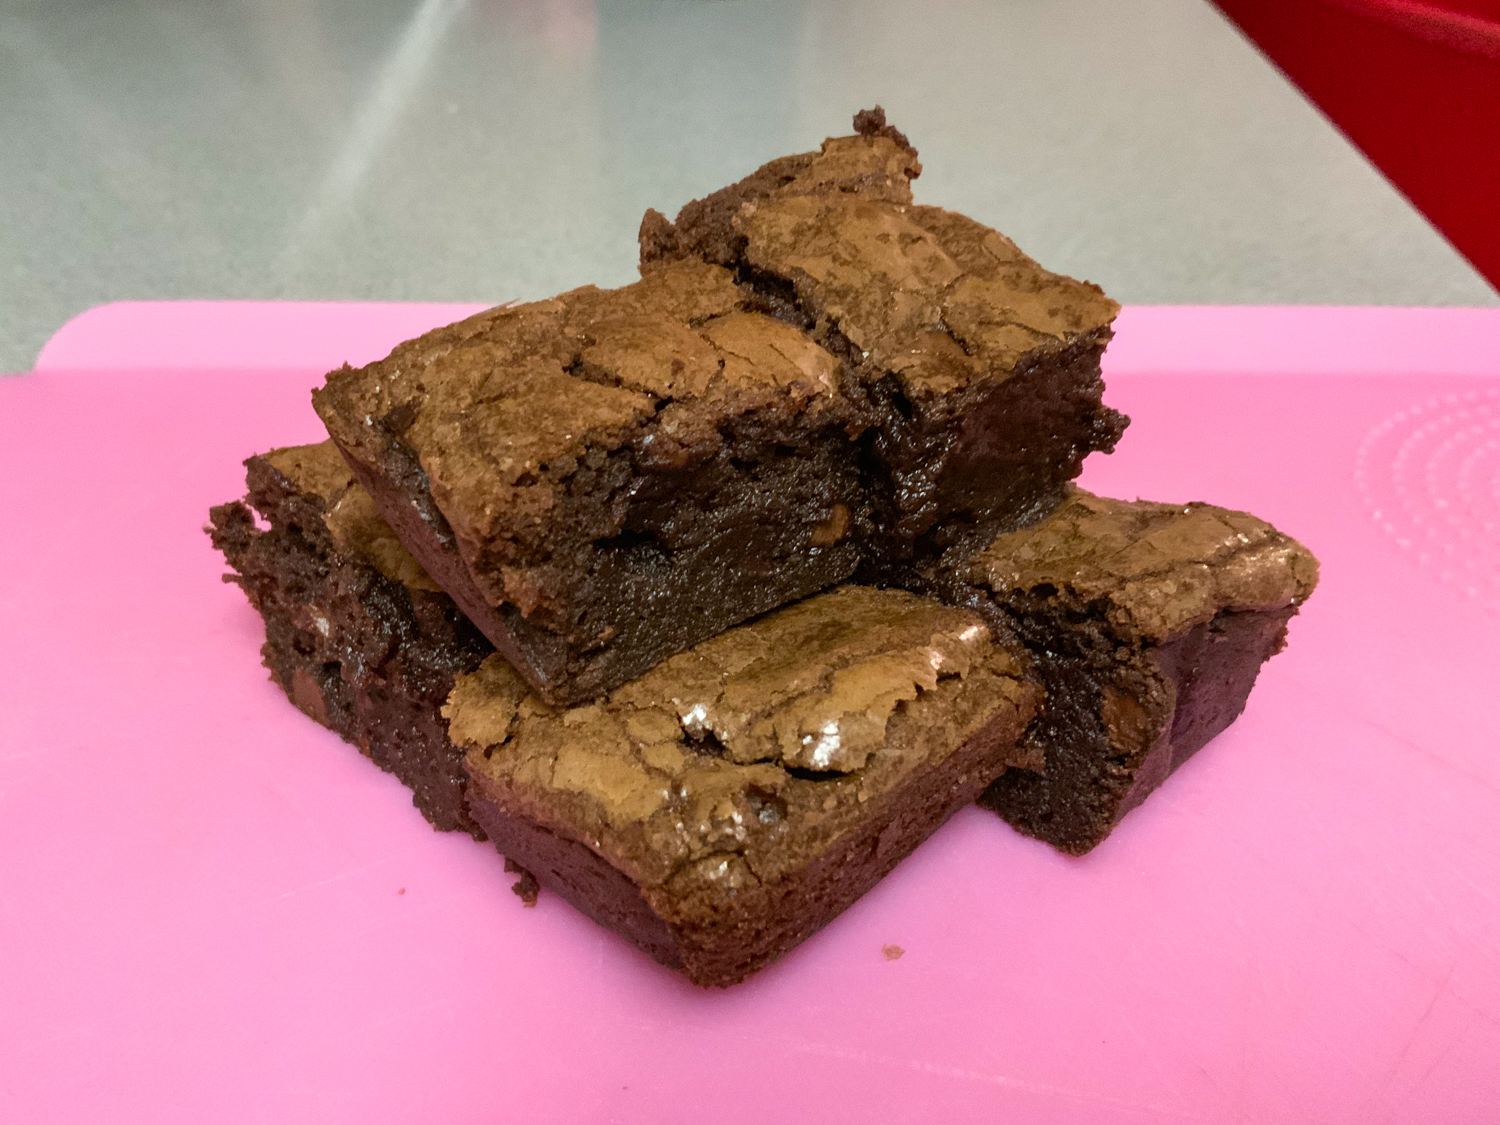
11. Set the brownies on a cooling rack and cool completely in the pan.
Use the parchment paper to lift the cooled brownies out of the pan. Cut into pieces and enjoy!

Click here to see the original recipe by Tasty.co

Previous Post: What’s the Best Brownie Mix?